Installing floor tiles can be a satisfying DIY project that transforms the look and feel of your space. However, to achieve a professional finish, it’s essential to know how to mix and apply floor tile adhesive correctly. In this step-by-step guide, we’ll walk you through the process to help you achieve a flawless tile installation.
Before you begin, make sure you have the following materials and tools on hand:
- Floor tile adhesive
- Notched trowel
- Bucket
- Mixing paddle (for a power drill)
- Measuring cup
- Water
- Sponge
- Rags or towels
- Level
- Tiles
Step 1: Prime the Surface
Priming the floor in tiling refers to the process of applying a special primer or bonding agent to the substrate (the surface where you intend to install the tiles) before laying down the tile adhesive and tiles.
This step is essential for several reasons:
1) Improved Adhesion:
Priming helps create a strong and secure bond between the adhesive and the substrate. It enhances the adhesive’s ability to stick to the surface, reducing the risk of tiles coming loose over time.
2) Preventing Moisture Absorption:
Some substrates, like concrete or plywood, can be porous and absorb moisture from the adhesive too quickly. This can weaken the adhesive’s bond and lead to tile installation problems. Priming seals the substrate’s surface, preventing it from absorbing moisture too rapidly.
3) Even Surface:
Priming can help create a uniform and stable surface by sealing porous areas and leveling out minor imperfections. This ensures that the tiles lay flat and evenly.
4) Reducing Efflorescence:
In some cases, priming can also help reduce the appearance of efflorescence, which is the formation of white, powdery deposits on the surface of tiles due to moisture migration through the substrate.
NOTE
To prime a floor for tiling, you typically apply the primer with a brush or roller, allowing it to dry before proceeding with the tile adhesive application. Always follow the manufacturer’s instructions for the specific primer product you are using, as application methods and drying times may vary. Priming is a crucial step in achieving a successful and long-lasting tile installation.
Step 2: Mix adhesive with water.
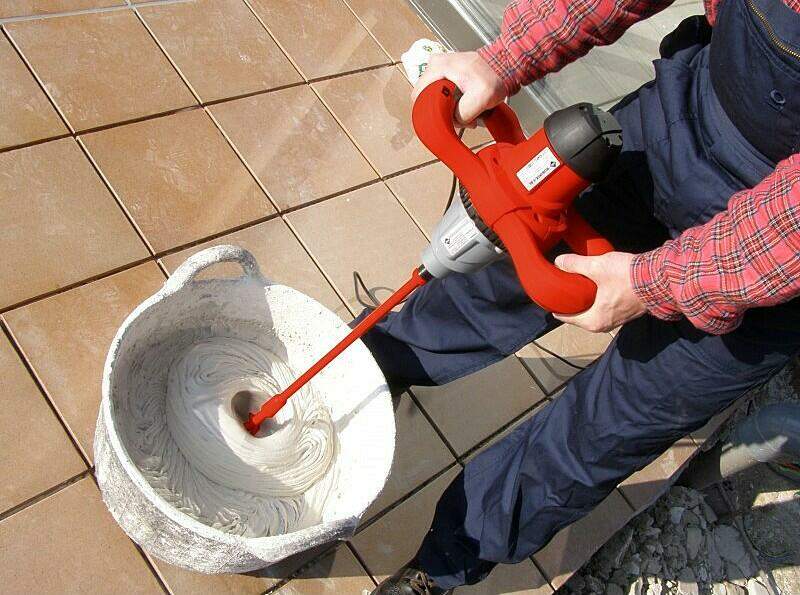
After priming the surface, the next step is to mix adhesive with water.
This is a fundamental step in the tiling process, as it directly impacts the quality and effectiveness of your tile installation.
This step entails the following process:
a. Product Selection:
Start by choosing the appropriate tile adhesive for your project. Different types of tiles (ceramic, porcelain, natural stone, etc.) and substrates (concrete, plywood, drywall, etc.) may require different adhesive formulations. Be sure to read the manufacturer’s recommendations and select the one that suits your specific needs.
b. Measuring:
Before you mix the adhesive with water, measure both the powder and the water carefully, adhering to the manufacturer’s specified mixing ratios. Using the correct proportions is crucial to achieving the right adhesive consistency.
c. Mixing:
Place the adhesive powder in a clean bucket and add the prescribed amount of water gradually. Stir the mixture thoroughly, using a mixing paddle attached to a power drill or a hand-held stir stick. The goal is to create a smooth, lump-free paste with a consistency similar to that of pancake batter.
d. Rest Period:
Allow the mixture to rest for a few minutes (typically 5-10 minutes). This resting period allows it to hydrate and reach its optimal consistency. Do not skip this step, as it can significantly impact the adhesive’s bonding strength.
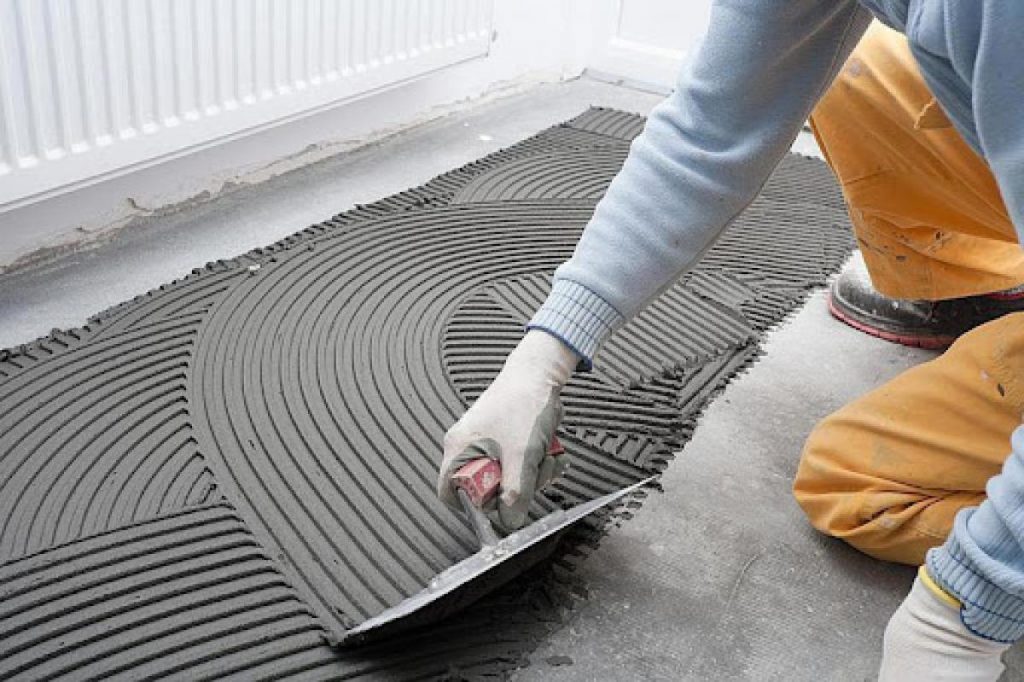
Step 3: Thinly Apply the Adhesive as you create notches on it.
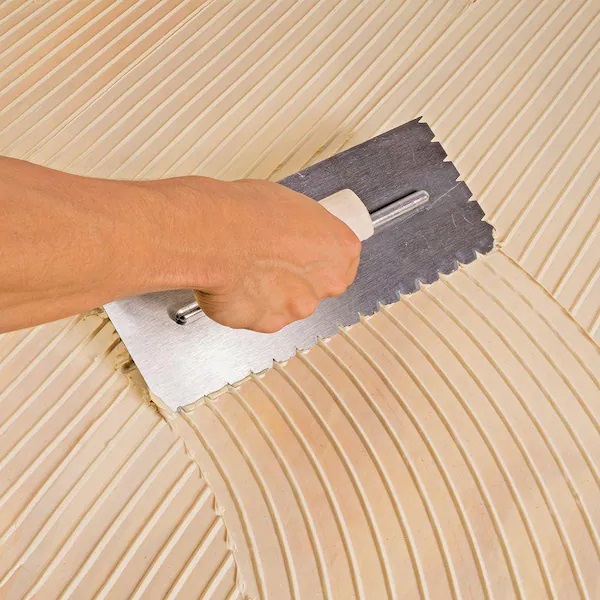
After the mixture has rested for the recommended time, it is now time to apply it carefully as you create notches.
Applying it thinly during tiling is an important aspect of achieving a professional and durable tile installation.
Here’s how to do it correctly:
- Use the Right Trowel: Choose a notched trowel with the appropriate notch size for the size and type of tiles you are installing. The trowel’s notches create ridges in the adhesive, and the size of these ridges determines the thickness of the layer. Generally, smaller tiles may require smaller notches, while larger tiles may need larger notches.
- Spread the Adhesive Evenly: Start by spreading a thin, even layer onto the substrate. Hold the trowel at a 45-degree angle and use consistent pressure to achieve a uniform adhesive thickness. Ensure that the adhesive covers the entire area where you plan to place the tiles.
- Maintain Consistency: As you work, periodically check the adhesive thickness using a straightedge or a level. Adjust your trowel angle and pressure as needed to achieve the desired thinness. Consistency is key to avoid variations in thickness.
- Don’t Overapply: It’s better to err on the side of applying too little adhesive initially. You can always add a bit more if needed. Over Applying it can lead to difficulties in leveling the tiles and may result in uneven tile placement.
- Work in Sections: Apply adhesive and lay tiles in manageable sections to ensure that it doesn’t begin to set before you place the tiles. This is especially important when working with fast-setting adhesives.
- Check the Notches: Periodically check the notches to ensure they are consistent in size and depth. Adjust your technique if needed to maintain uniformity.
Why this step is important…
- Even Tile Placement: Thinly applied adhesive helps ensure that the tiles are placed evenly and are at the same height. This is crucial for creating a smooth and aesthetically pleasing surface.
- Reduced Risk of Lippage: Lippage occurs when tiles are uneven, and one edge is higher than the adjacent tile. Thinly applied adhesive minimizes the risk of lippage by allowing for better control over tile placement and alignment.
- Optimal Bonding: Thinner adhesive layers allow for better contact between the tile and the substrate, promoting a stronger bond. Thick layers may not allow the tiles to fully adhere, leading to potential issues over time.
Step 4: Place the Tiles firmly on the adhesive.
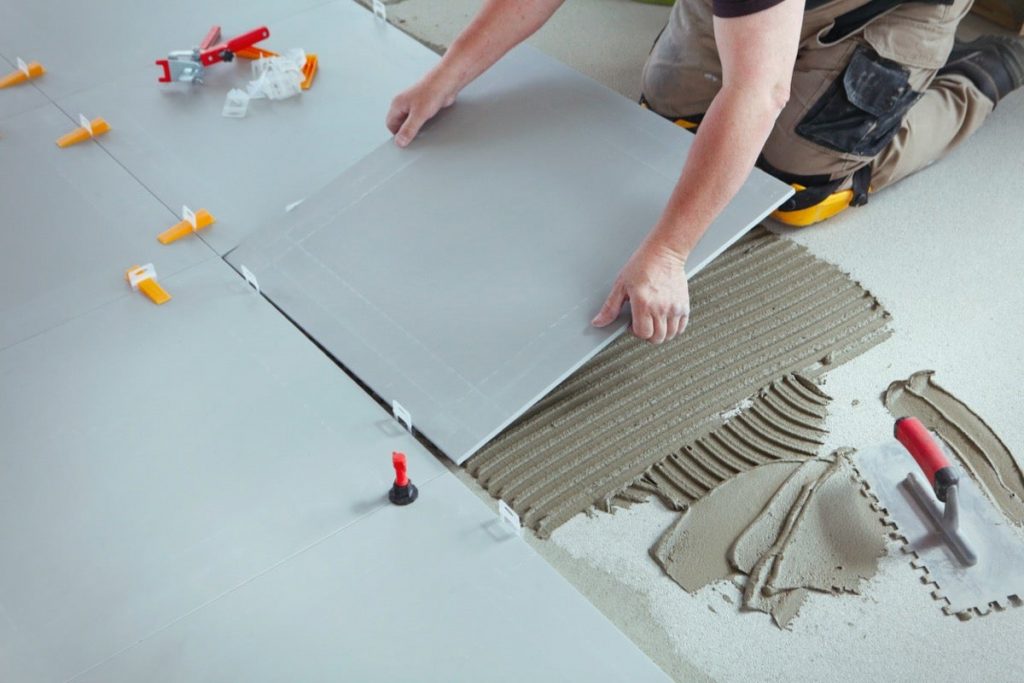
Once the adhesive is notched, immediately place the tiles onto the adhesive bed.
Placing the tiles firmly on the bed is a critical step in achieving a secure and professional tile installation.
Here’s how to do it properly.
Steps:
- Prepare Your Tiles: Before you start laying tiles, ensure they are clean and free of dust or debris. Lay out your tiles nearby in the desired pattern or layout to make the installation process smoother.
- Begin at the Layout Reference Point: Start laying tiles at the layout reference point you established earlier. This point is typically at the center of the room or at the intersection of layout lines. This ensures that your tiles are laid out evenly and symmetrically.
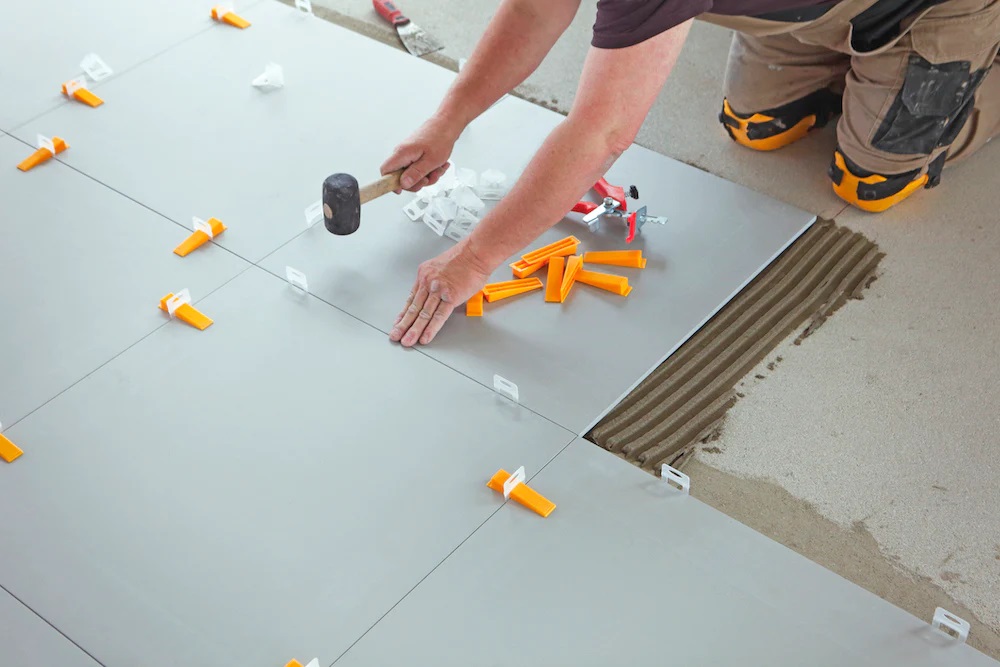
- Position the Tile: Carefully place the first tile onto the adhesive bed. Press it down gently to bed it. Ensure it is aligned with the layout lines and any adjacent tiles. It’s important to start with a firm but not excessive pressure.
- Use Tile Spacers: If your tile layout requires consistent gaps between tiles for grout lines, insert tile spacers between the corners of the first tile and the adjacent tiles. The spacers help maintain uniform gaps.
- Press Firmly and Evenly: Once the first tile is positioned and spaced correctly, press it firmly into the adhesive using a slight twisting motion. Apply even pressure across the entire tile surface. This helps to ensure good contact between the tile and the adhesive.
- Check for Level and Alignment: Use a level or straightedge to check that the tile is level and aligned with the adjacent tiles. Adjust the tile’s position as needed to achieve a level and uniform surface. Ensure there are no gaps or lippage (unevenness between adjacent tiles).
- Repeat the Process: Continue laying tiles one by one, following your layout plan, and using tile spacers as necessary. Each tile should be placed firmly into the adhesive and checked for level and alignment before moving on to the next one.
- Trimming Tiles: As you reach the edges of the installation area or around obstacles, you may need to cut or trim tiles to fit. Use a tile cutter or a wet saw to make precise cuts and ensure these cut tiles are also firmly pressed into the adhesive.
- Clean as You Go: Throughout the installation process, periodically clean away any adhesive that may have squeezed up between the tiles. A damp sponge or cloth can be helpful for this purpose.
- Allow Adhesive to Set: After completing the tile installation, allow the adhesive to set for the recommended time as specified by the adhesive manufacturer. Avoid walking on or disturbing the tiles during this curing period.
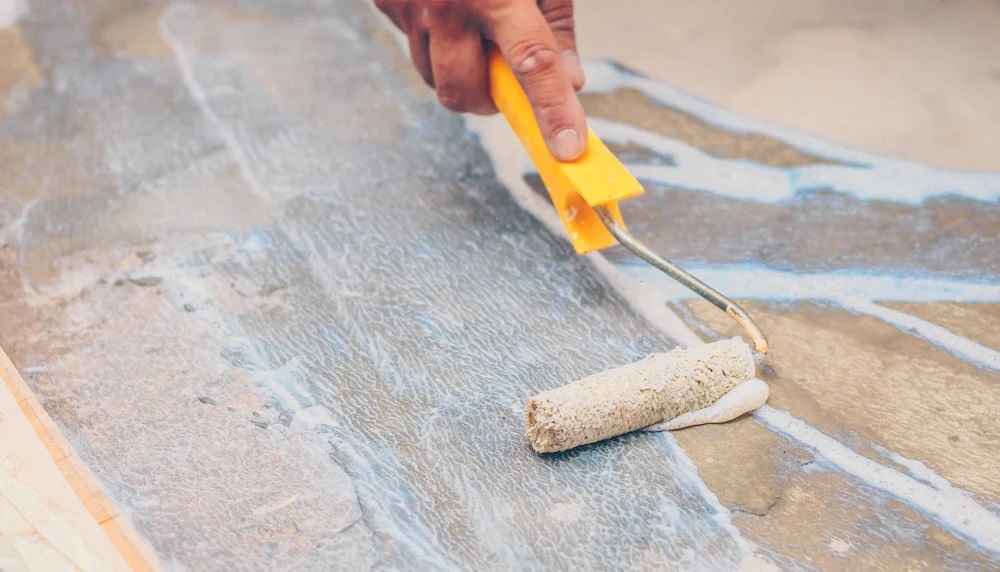
Step 5: Apply grout using spacers.
Applying grout using spacers is a crucial step in the tile installation process.
Grout not only fills the gaps between tiles but also helps stabilize and support them.
Here’s how to apply grout using spacers
Steps:
- Mix the Grout: Prepare the grout mixture according to the manufacturer’s instructions. Typically, you’ll mix the grout powder with water to achieve a thick, smooth consistency. Let it sit for a few minutes to allow it to hydrate.
- Fill the Grout Joints: Start by removing any tile spacers that you’ve used to maintain gaps between the tiles. These spacers should leave clean, evenly spaced joints.
- Load the Grout Float: Use a grout float, which is a rubber or foam tool with a flat surface. Scoop a generous amount of grout onto the float.
- Apply the Grout: Hold the grout float at a 45-degree angle and press the grout firmly into the joints between the tiles. Work the grout into the gaps by moving the float diagonally across the tiles, making sure to fill each joint completely.
- Scrape Excess Grout: After applying the grout, use the edge of the grout float to scrape off excess grout from the surface of the tiles. This will help create a smooth and even grout line.
- Clean Up as You Go: Continuously clean the grout float and any grout residue from the tile surface using a damp sponge and clean water. Rinse the sponge frequently to avoid smearing grout on the tiles.
- Check Grout Line Depth: Ensure that the grout lines are consistently filled and that there are no low or empty spots. If needed, add more grout and re-scrape the surface.
- Final Wipe Down: Once you’ve applied and cleaned the grout, allow it to set for a brief period as indicated by the grout manufacturer’s instructions (usually about 15-20 minutes).
- Sponge the Surface: Using a clean, damp sponge, lightly wipe the tiles to remove any remaining grout haze or residue. Rinse the sponge frequently but avoid over-wetting the grout lines.
- Seal the Grout (Optional): After the grout has fully cured (usually after a day or two), you can consider applying a grout sealer to protect the grout lines from staining and moisture penetration. Follow the sealer manufacturer’s instructions for application.
Conclusion
By following these steps for mixing and applying floor tile adhesive, you’ll be well on your way to achieving a professional-looking tile installation. Remember to take your time, work meticulously, and don’t rush the process. With patience and attention to detail, you can transform your space with beautiful, long-lasting floor tiles.
Follow us on all our social media platforms to stay updated on the modern trends in tiles wrought iron and painting ideas. Facebook Website X